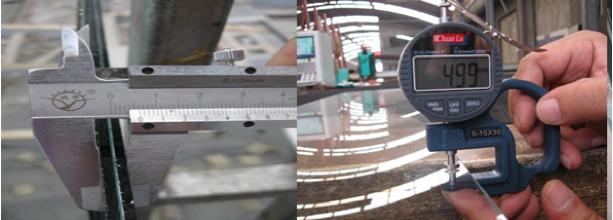


Tempered Glass Inspection Criteria
|
Category |
No. |
Item |
Method |
Spec |
|
|
|
|
|
|
|
|
1 |
Length |
callipers |
±0.05mm |
|
Dimension |
|
|
|
|
|
2 |
Width |
callipers |
±0.05mm |
|
|
|
|
|
|
|
|
|
3 |
Thickness |
callipers |
±0.05mm |
|
|
|
|
|
|
|
|
|
|
|
Depth≤50% of thickness |
|
|
1 |
Edge Chips |
view |
|
|
|
Width≤50% of thickness |
|||
|
|
|
|
|
|
|
|
|
|
|
Length≤two times its width |
|
|
|
|
|
|
|
|
2 |
Scratches |
view |
not allowed |
|
|
|
|
|
|
|
|
3 |
Dig |
view |
not allowed |
|
|
|
|
|
|
|
Appearance |
4 |
Dirt |
view |
not allowed |
|
|
5 |
Pinholes |
view |
not allowed |
|
|
|
|
|
|
|
|
6 |
Gaseous inclusion |
view |
not allowed |
|
|
|
|
|
|
|
|
7 |
Rubs |
view |
not allowed |
|
|
|
|
|
|
|
|
8 |
Bow and Warp |
view |
not allowed |
|
|
|
|
|
|
|
|
9 |
Distortion |
view |
not allowed |
|
|
|
|
|
|
|
|
1 |
Transmittance |
Transmittance tester |
92%±2% |
|
|
|
|
|
|
|
|
2 |
Bending test |
Manual operation |
70±5 degree |
|
|
|
|
|
|
|
|
3 |
Shock resistance |
33g steel ball shock |
not broken |
|
|
from height of 60cm |
|||
|
|
|
|
|
|
|
Function |
|
|
|
|
|
4 |
Water droplets |
Contact angle values |
≥105 degree |
|
|
|
Angle test |
|||
|
|
|
|
|
|
|
|
|
|
|
|
|
|
5 |
Hardness |
Hardness tester |
≥9 H |
|
|
|
|
|
|
|
|
6 |
Exhaust velocity |
Evacuation time |
5-6 s |
|
|
|
|
|
|
|
|
7 |
Fracture test |
Fracture morphology |
smoothness |
|
|
|
|
|
|
Reference documents:
Any flaws that develop as a result of the manufacturing or handling process are inspected
using the Glass Industry Standards ASTM C1036 for Flat Glass, ASTM C1048 for Heat Treated Glass.
Terminology:
Edge Chips — An unwanted piece of glass that is protruded from a workpiece.Chips are formed when a tool cuts or grinds glass
dig —deep,short scratch
dirt—small particle of foreign matter embedded in the surface of flat glass. gaseous inclusion—round or elongated bubble in the glass.
rub —abrasion of a glass surface producing a frosted appearance.
scratch —damage on a glass surface in the form of a line caused by the movement of an object across and in contact with the glass surface.
Inspection:
Visual inspection should be done with the naked eye. The inspector shall place the glass in a vertical position.
Inspector shall view through the glass at an angle of 90 o Lighting should be daylight level (without direct sunlight) or other uniform backlight that simulates daylight.
View at the distance specified by defect type.
Glass Type:color/clear float glass, reflective glass, tempered glass,
laminated glass, mirror, painted glass, acid etched glass,tinted glass

Some workmanship checking points for glass quality control:
1-Appearance: no indentations, broken, scratch, distortion, rust, crack, etc defects
2-The product is clean and without visible defects.
3.The glass should match the samples
4.Check poor quality or missing arrised edges
5.Check the width and height measurements
6.Check the package.